I built a Tube arrivals Android app
• 9 min read
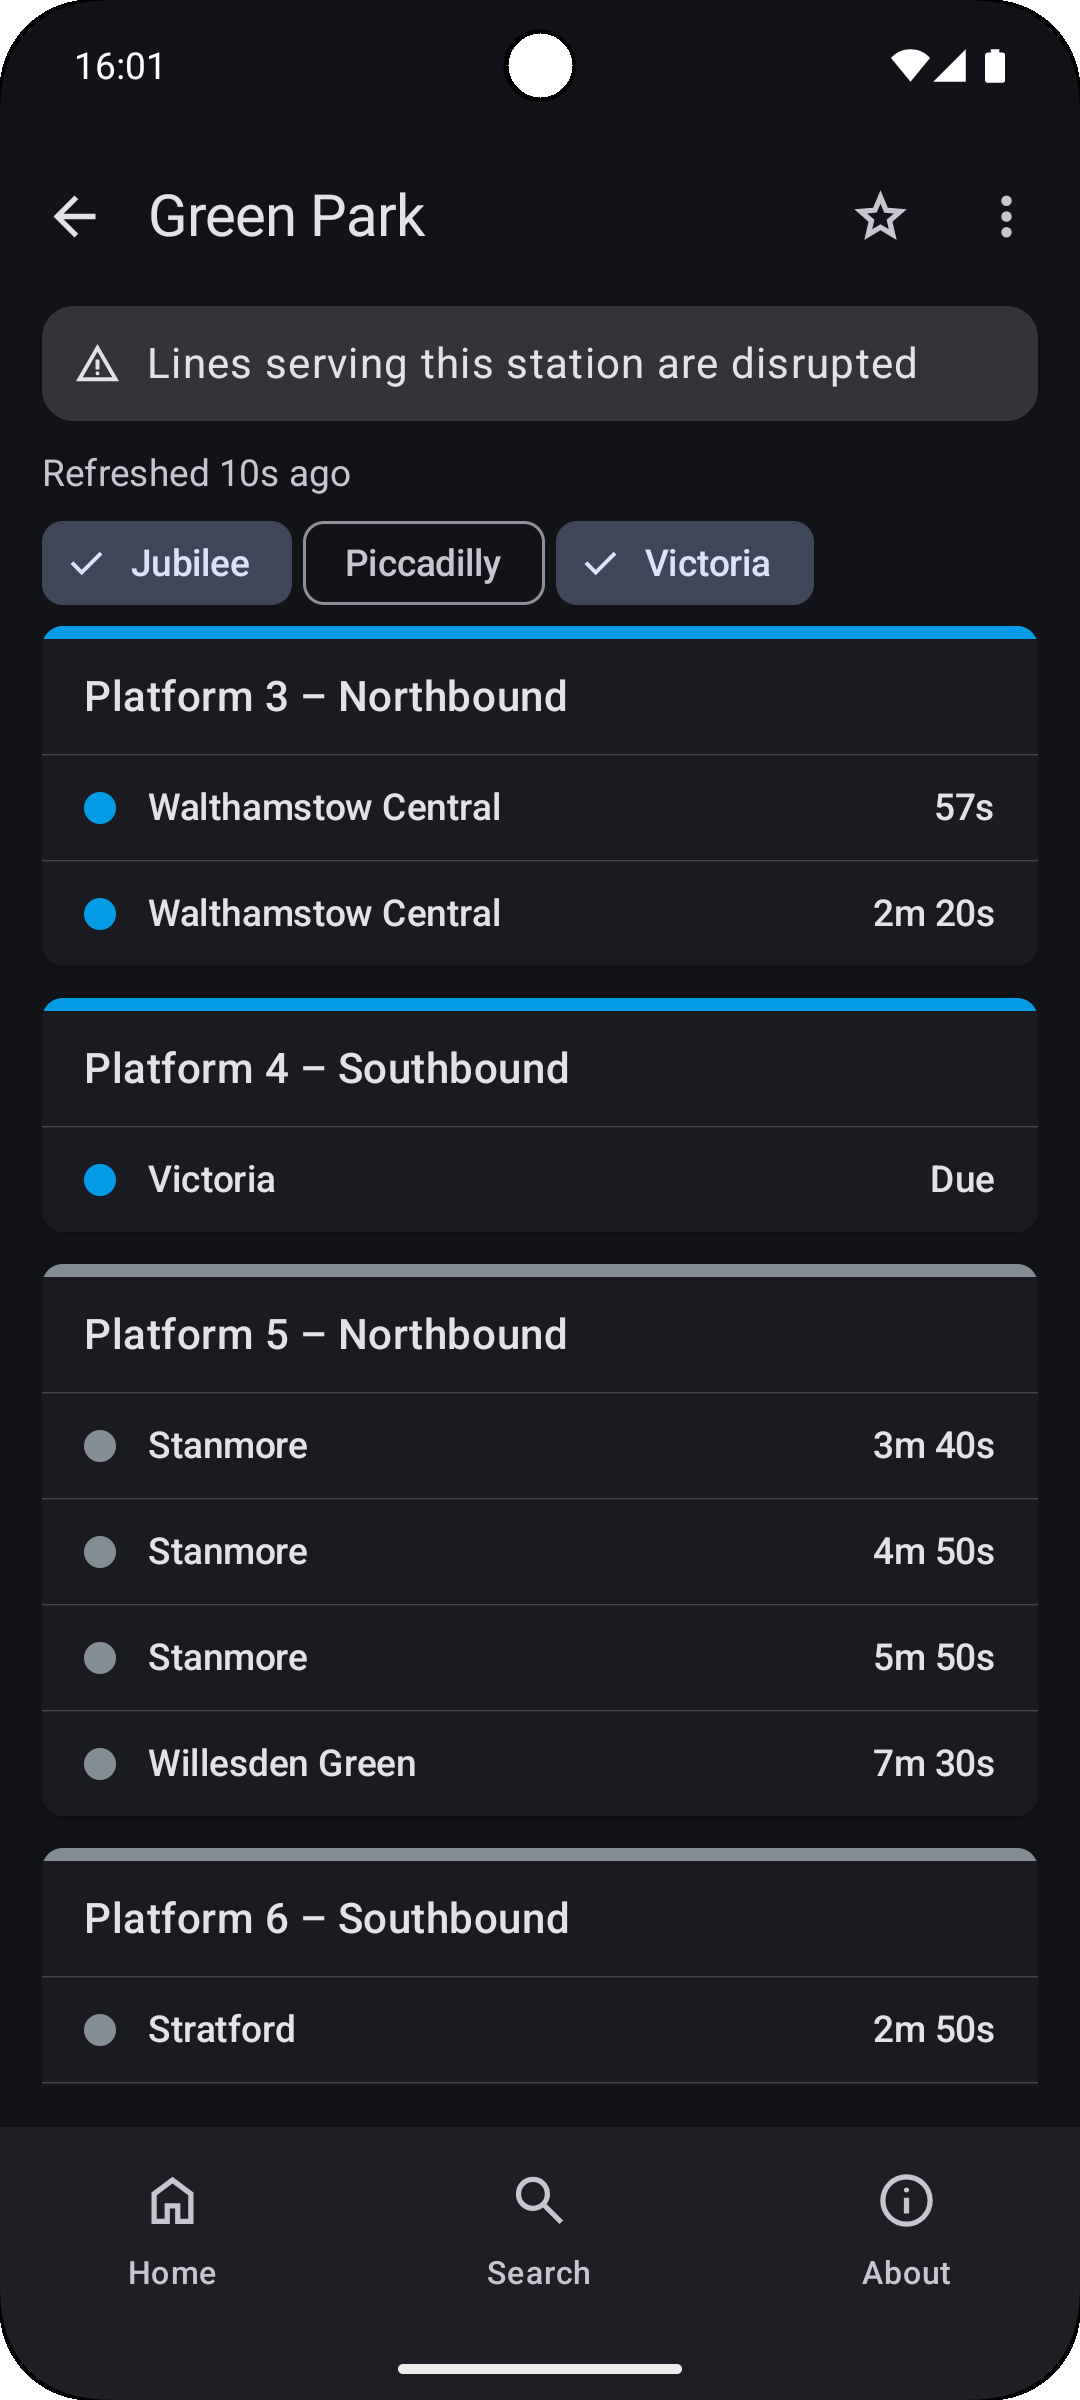
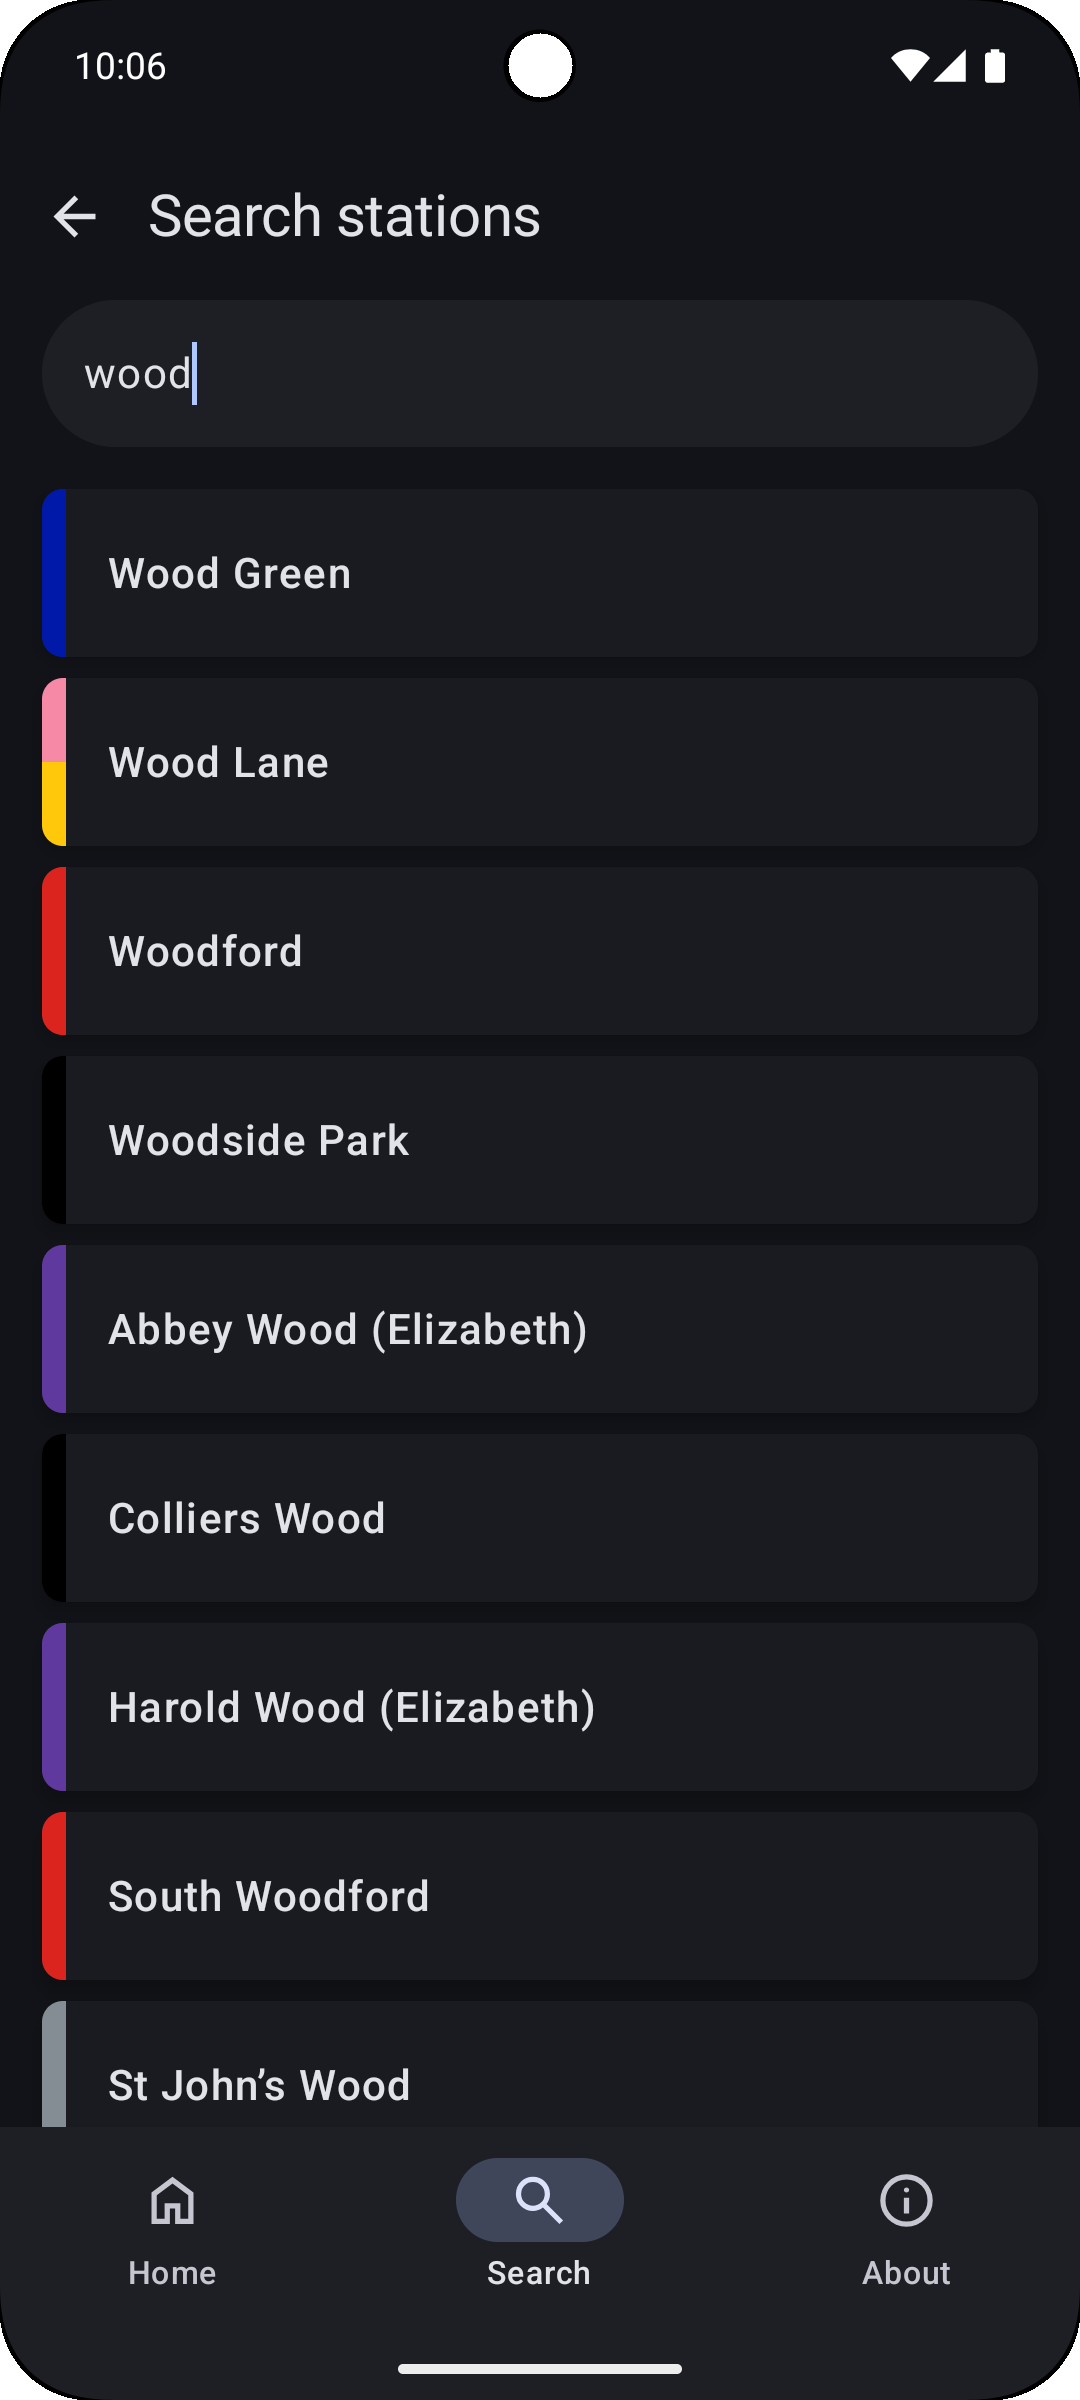
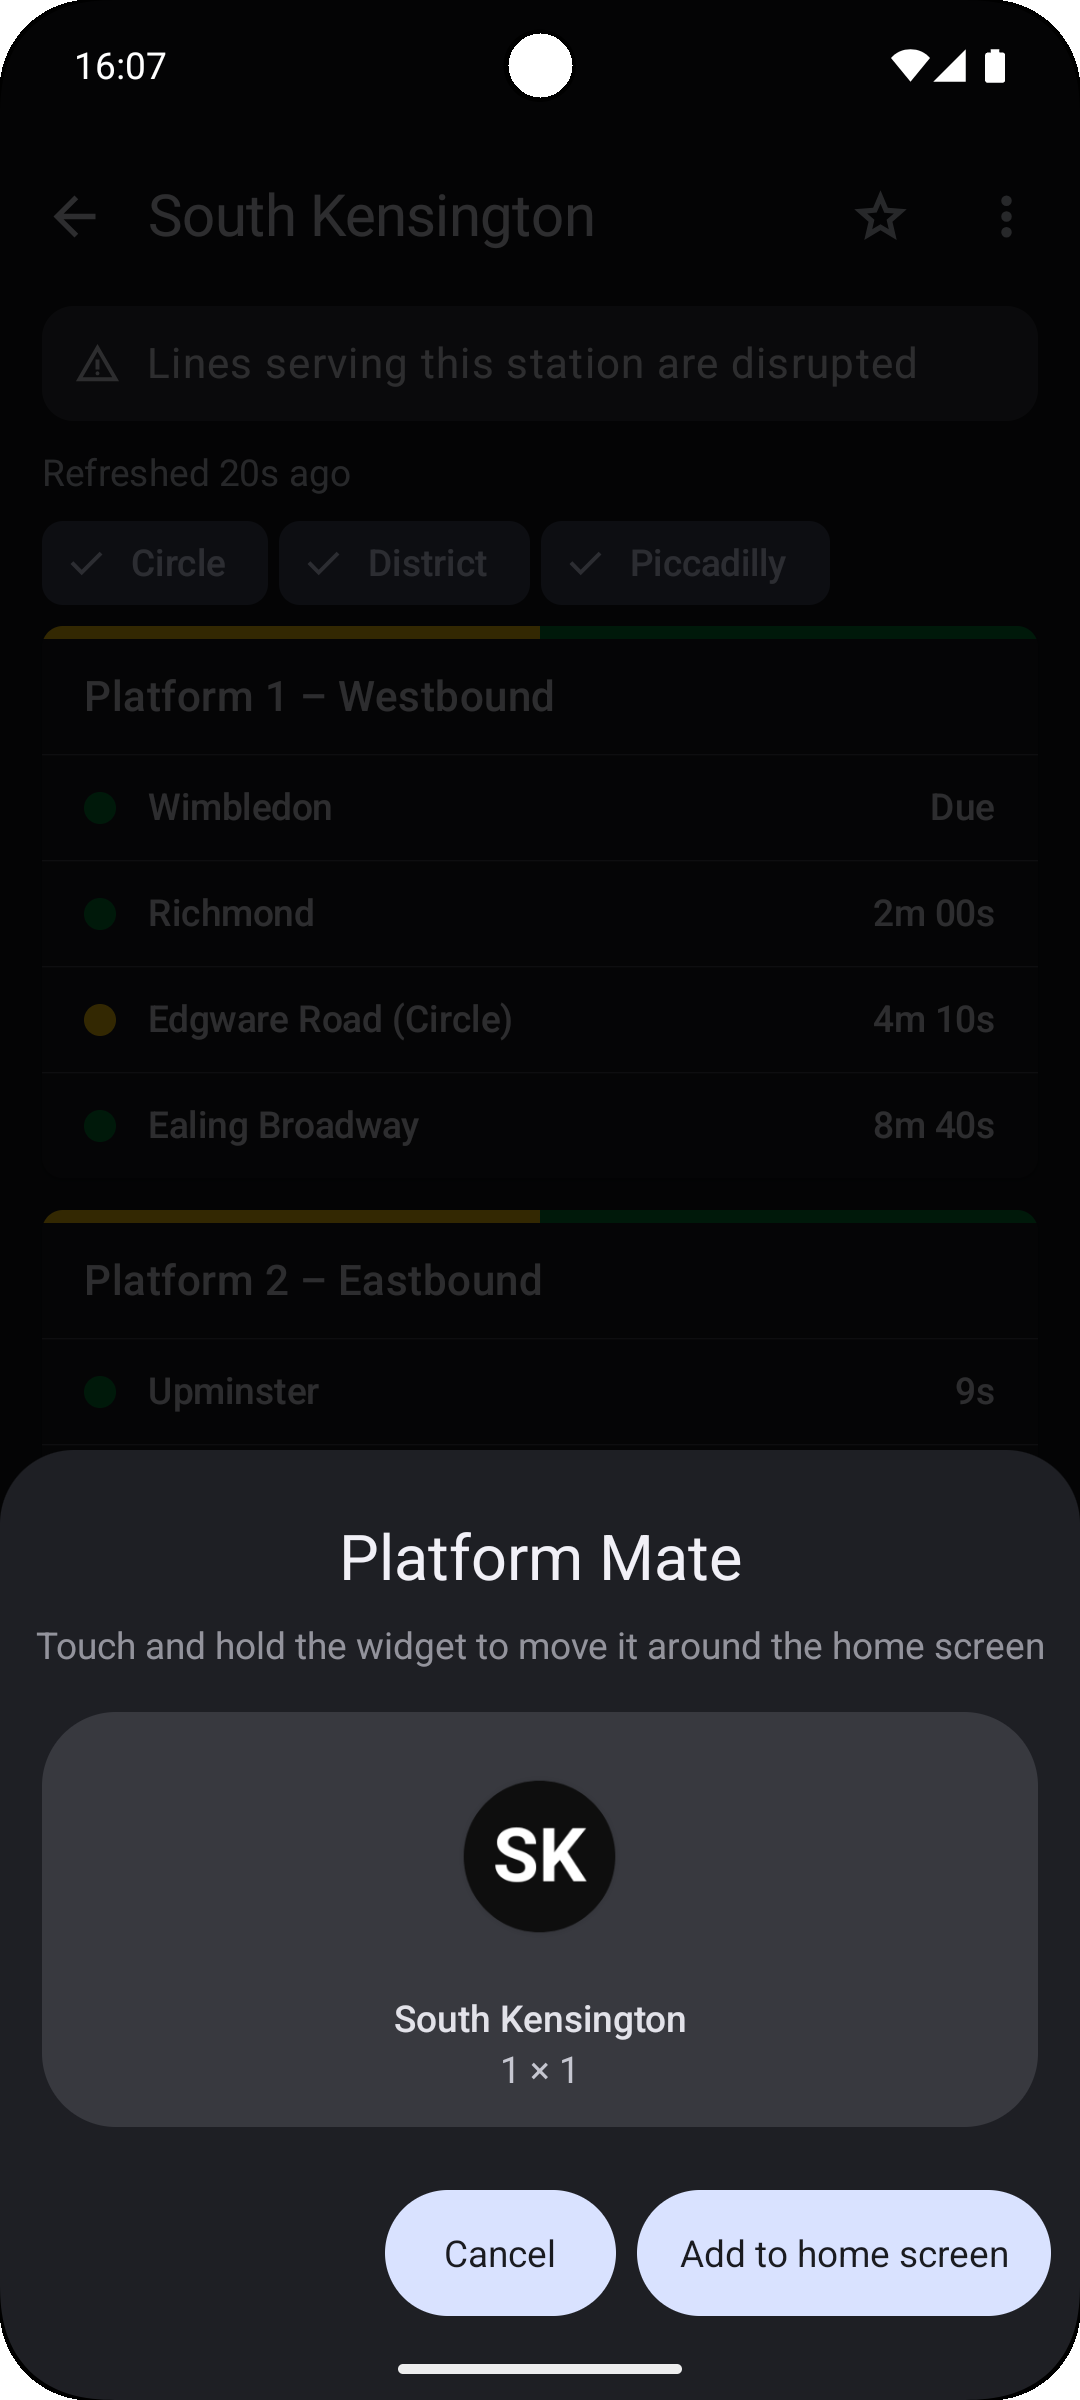
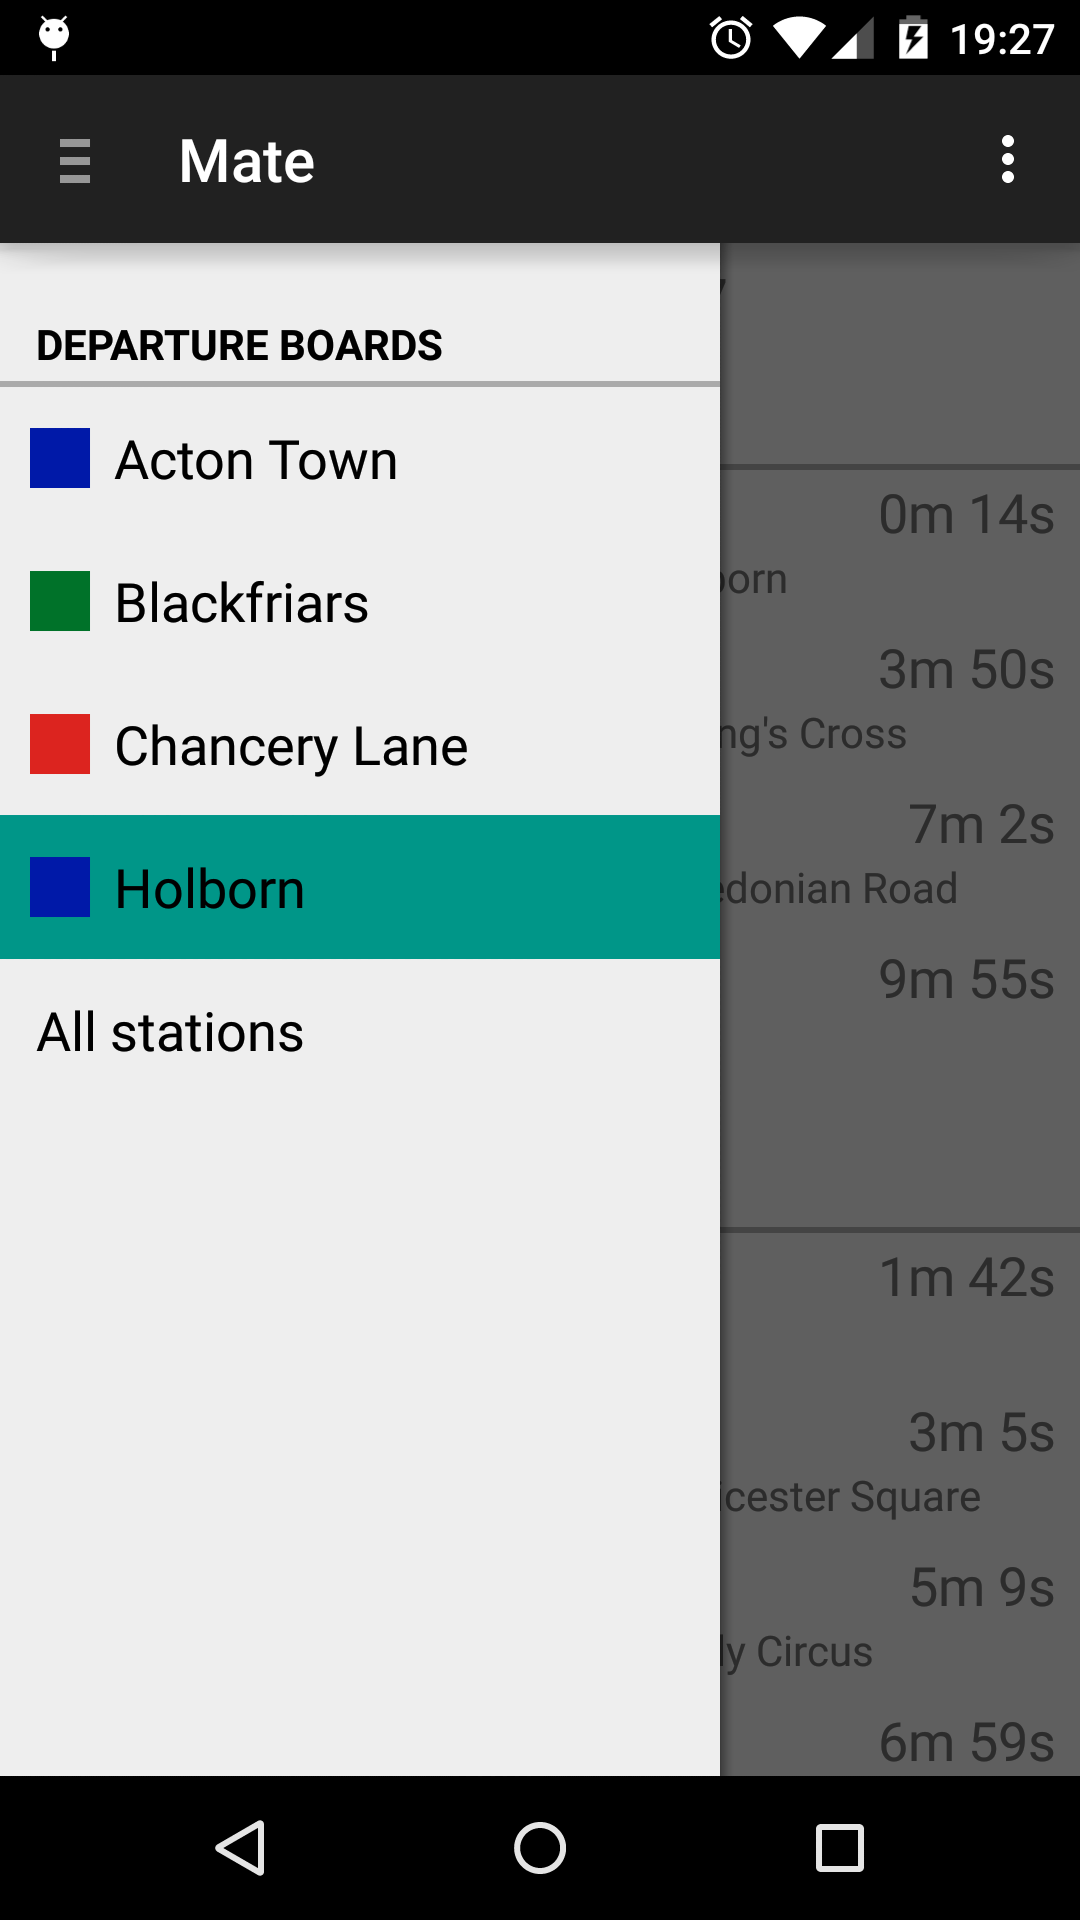
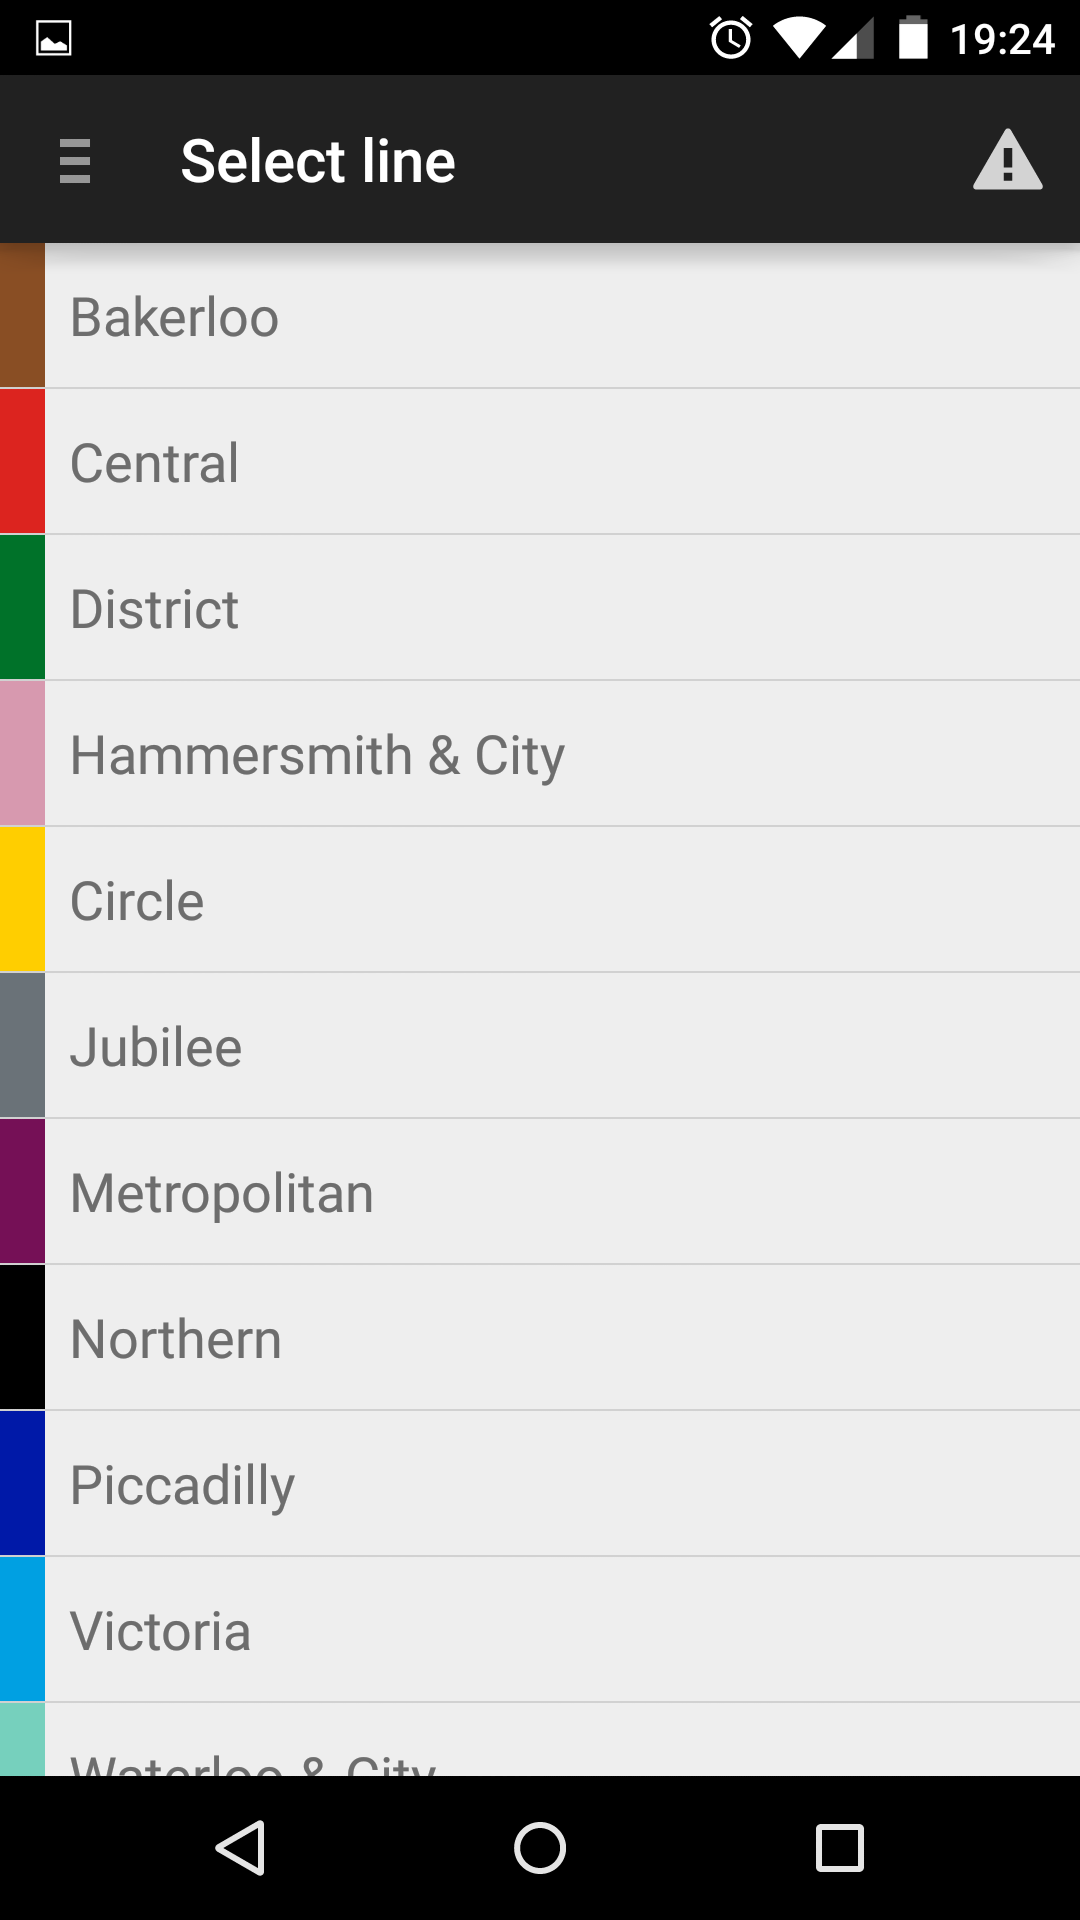
I built an Android app for showing live London Underground train arrival times (Google Play, UK only).
Here are some screenshots:

While that’s the new app that I’ve built, I first built a Tube arrivals1 app just over 11 years ago (first published as “Tube Ninja” 😆). That one died a slow death – mainly as I didn’t bother keeping up with all the changes and new requirements for publishing on Google Play (not to mention the faff of upgrading Gradle and other bits all the time).
Recently, though, I had some time to revisit the original app. I got it working again without too much faff. But, the app was written using the tech of 11 years ago – things like Java, fragments and XML-based layouts. It also used UI patterns and components that are now out of date.
I started converting the app to Kotlin, but then quickly pivoted to rewriting the app from scratch.
Aren’t there already apps for this?
There’s an official app and a handful of unofficial apps. None of them quite work in the way I want them to, though.
Generally speaking, I want to get to the data with minimal friction, I roughly want to see the same thing that’s on the station platform board on my phone, and I want to be able to manually refresh the data if it’s clearly out of date.
Can’t I just look at the boards at the station?
There are a few different scenarios where I’d use an app like mine. One is at the start of a journey – I might want to know how fast to walk, or I might want to pick between two different routes or modes of transport depending on which is going to be quicker. And if it turns out that the service is disrupted, I might forget about making the trip altogether.
Another scenario is to plan a change of lines in the middle of the journey. There might be more than one station you can change at, or more than one line you can use to complete the journey. In those cases, I like to have a look at the live data to work out which one will be quicker, or to make sure I don’t get stuck waiting for a train.
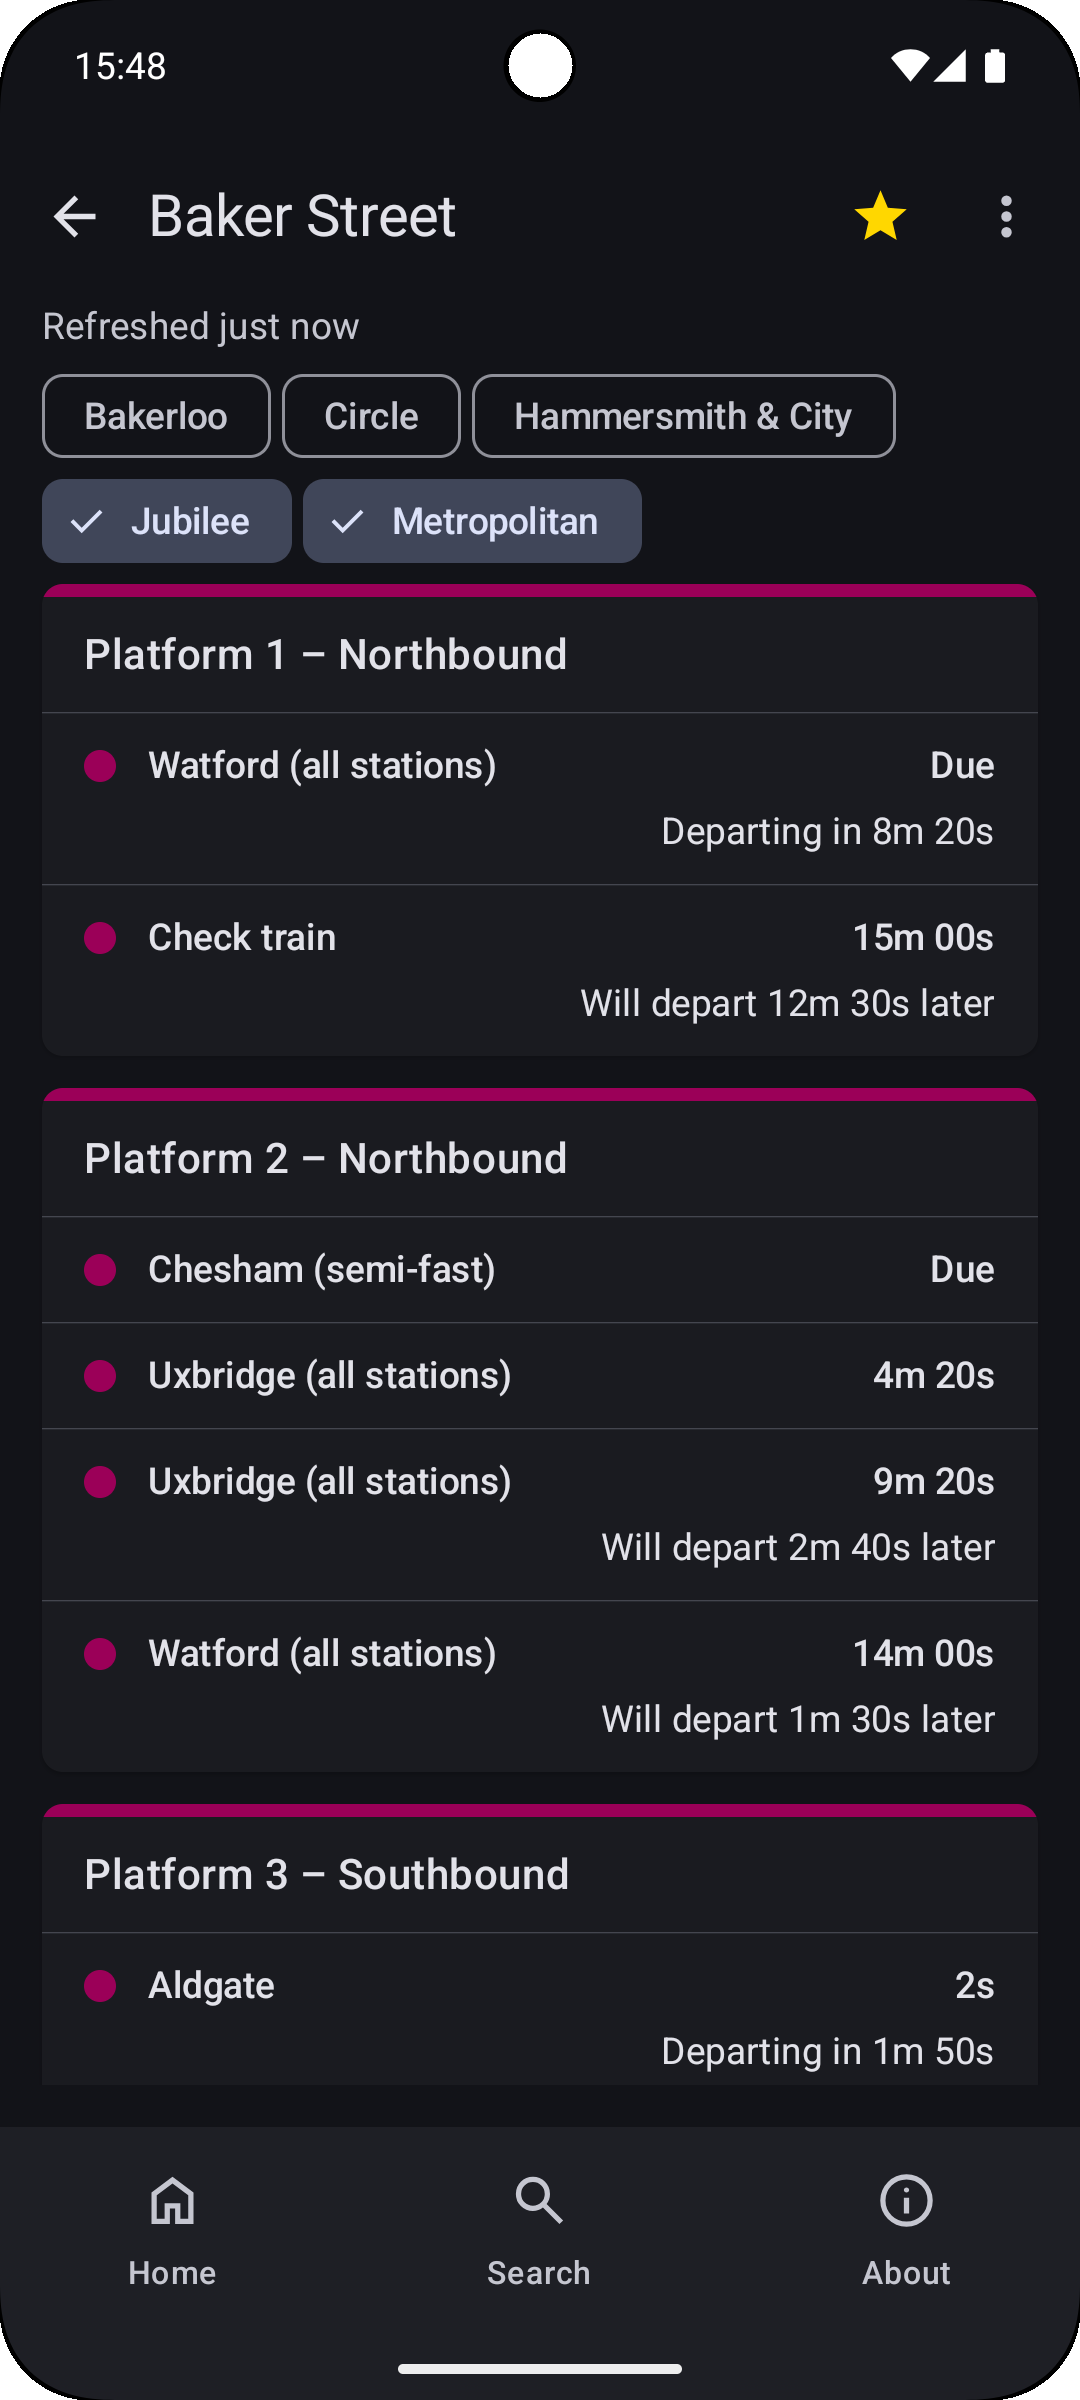
Another scenario is simply to pick the right platform in advance at more complex stations. The northbound Met line platforms at Baker Street are one instance of this. You have three northbound platforms, where trains on platforms 1 and 4 wait several minutes after completing their southbound journeys before travelling back north (north-west, more accurately). You also have trains that skip stops (called fast and semi-fast trains), as well as there being multiple branches of the line that trains can head down (indicated by the train’s destination). And you might not want to prioritise getting the first departing train – you might prefer to get on an empty train from platform 1 or 4 if one is there.
(You might notice from the screenshot above that I’ve spent some time trying to get Baker Street done well.)
The last scenario I can think of where I’d use such an app is simply when I’m waiting on a platform, and the real departures board is out of sight. (Or simply not working, as is often the case at my local station.)
Starting again, again
Getting back to my efforts to rewrite my app, I created a new project using one of the templates in Android Studio, thinking that it would give me up-to-date patterns out of the box.
I then discovered Jetpack Compose. Weirdly, it’s not2 presented as an explicit option when creating a new project in Android Studio. (The ‘Empty Activity’ option does give you something that uses Compose, but other options that sound more useful don’t.)
And so I started afresh a second time, this time using Compose.
Getting back into Android development
Having now used it, I quite like Jetpack Compose. It (along with Kotlin) is certainly much more pleasant than what was around when I built the old app.
Things I didn’t like
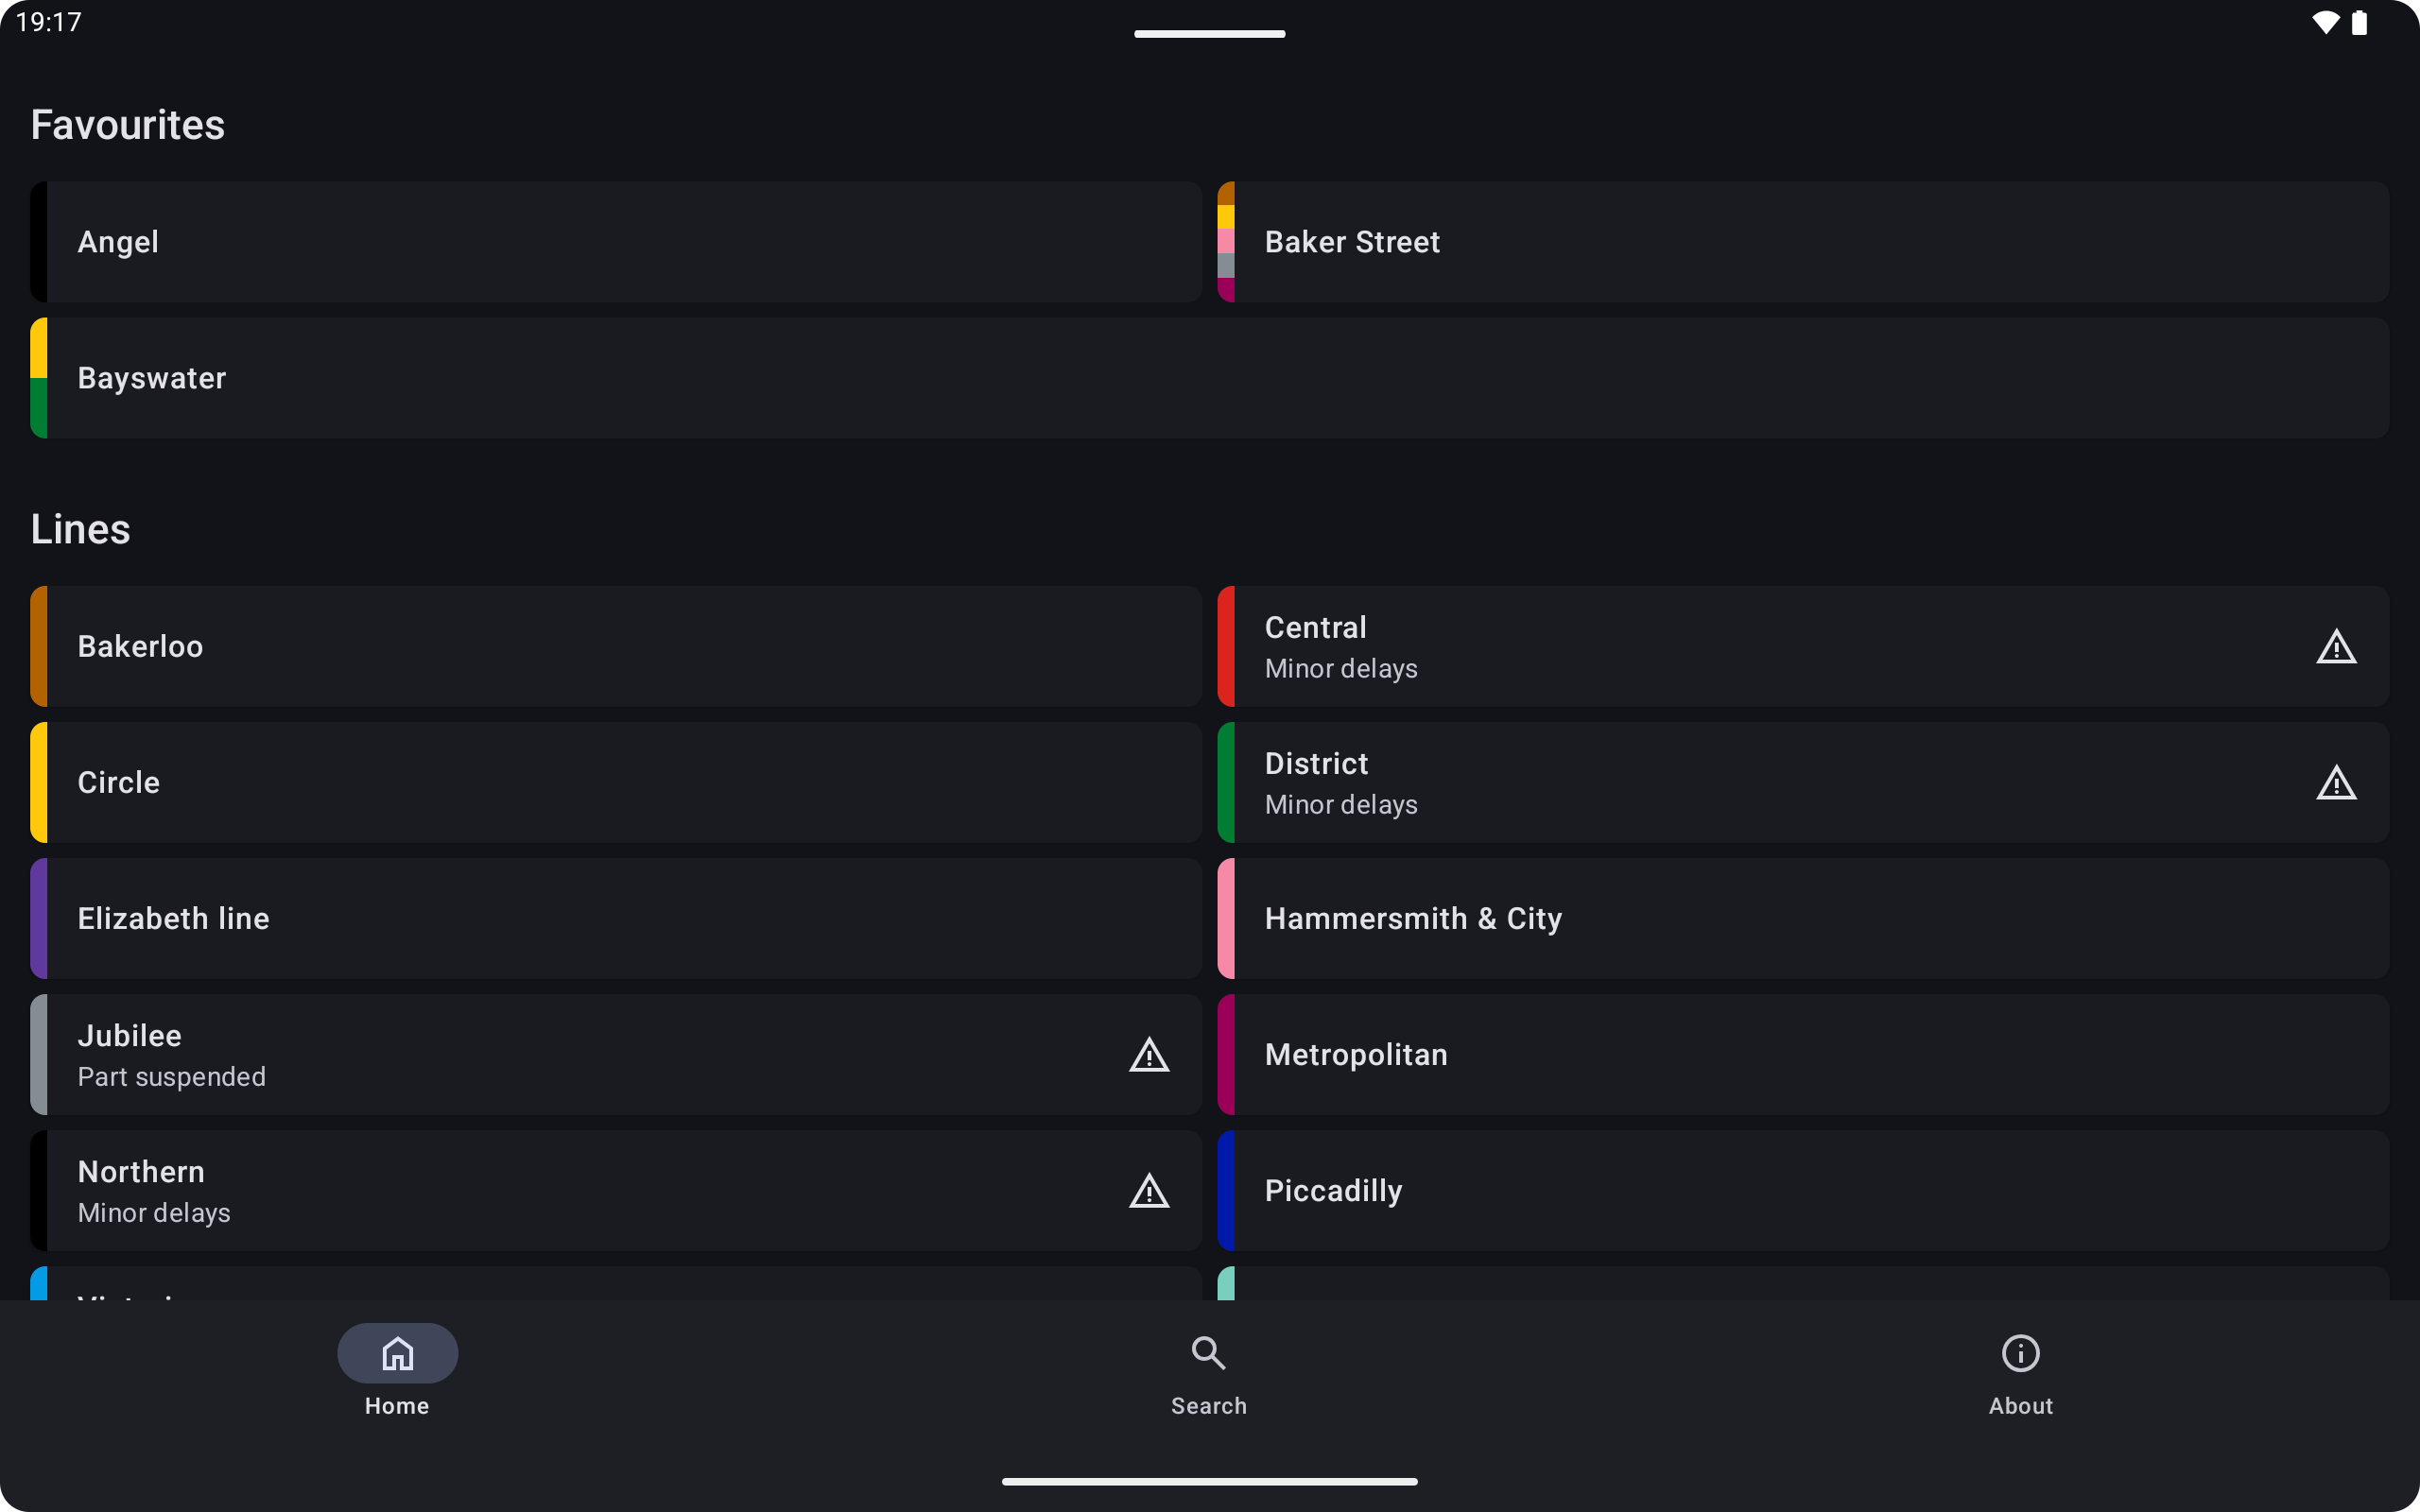
It wasn’t all perfect. While working on a tablet layout for my app, I realised I
needed something CSS grid-like with automatic wrapping and fitting.
FlowRow combined with item weights
seemed close to what I wanted. But I didn’t find a good way to stop it
stretching items on the last row to fit the entire row (when there are fewer
items on that row). Here’s an example of that problem in the favourite stations
list on the home screen of the app:
LazyVerticalGrid
had the layout that I wanted. But I didn’t want a lazy list that has its own
scroll bar.
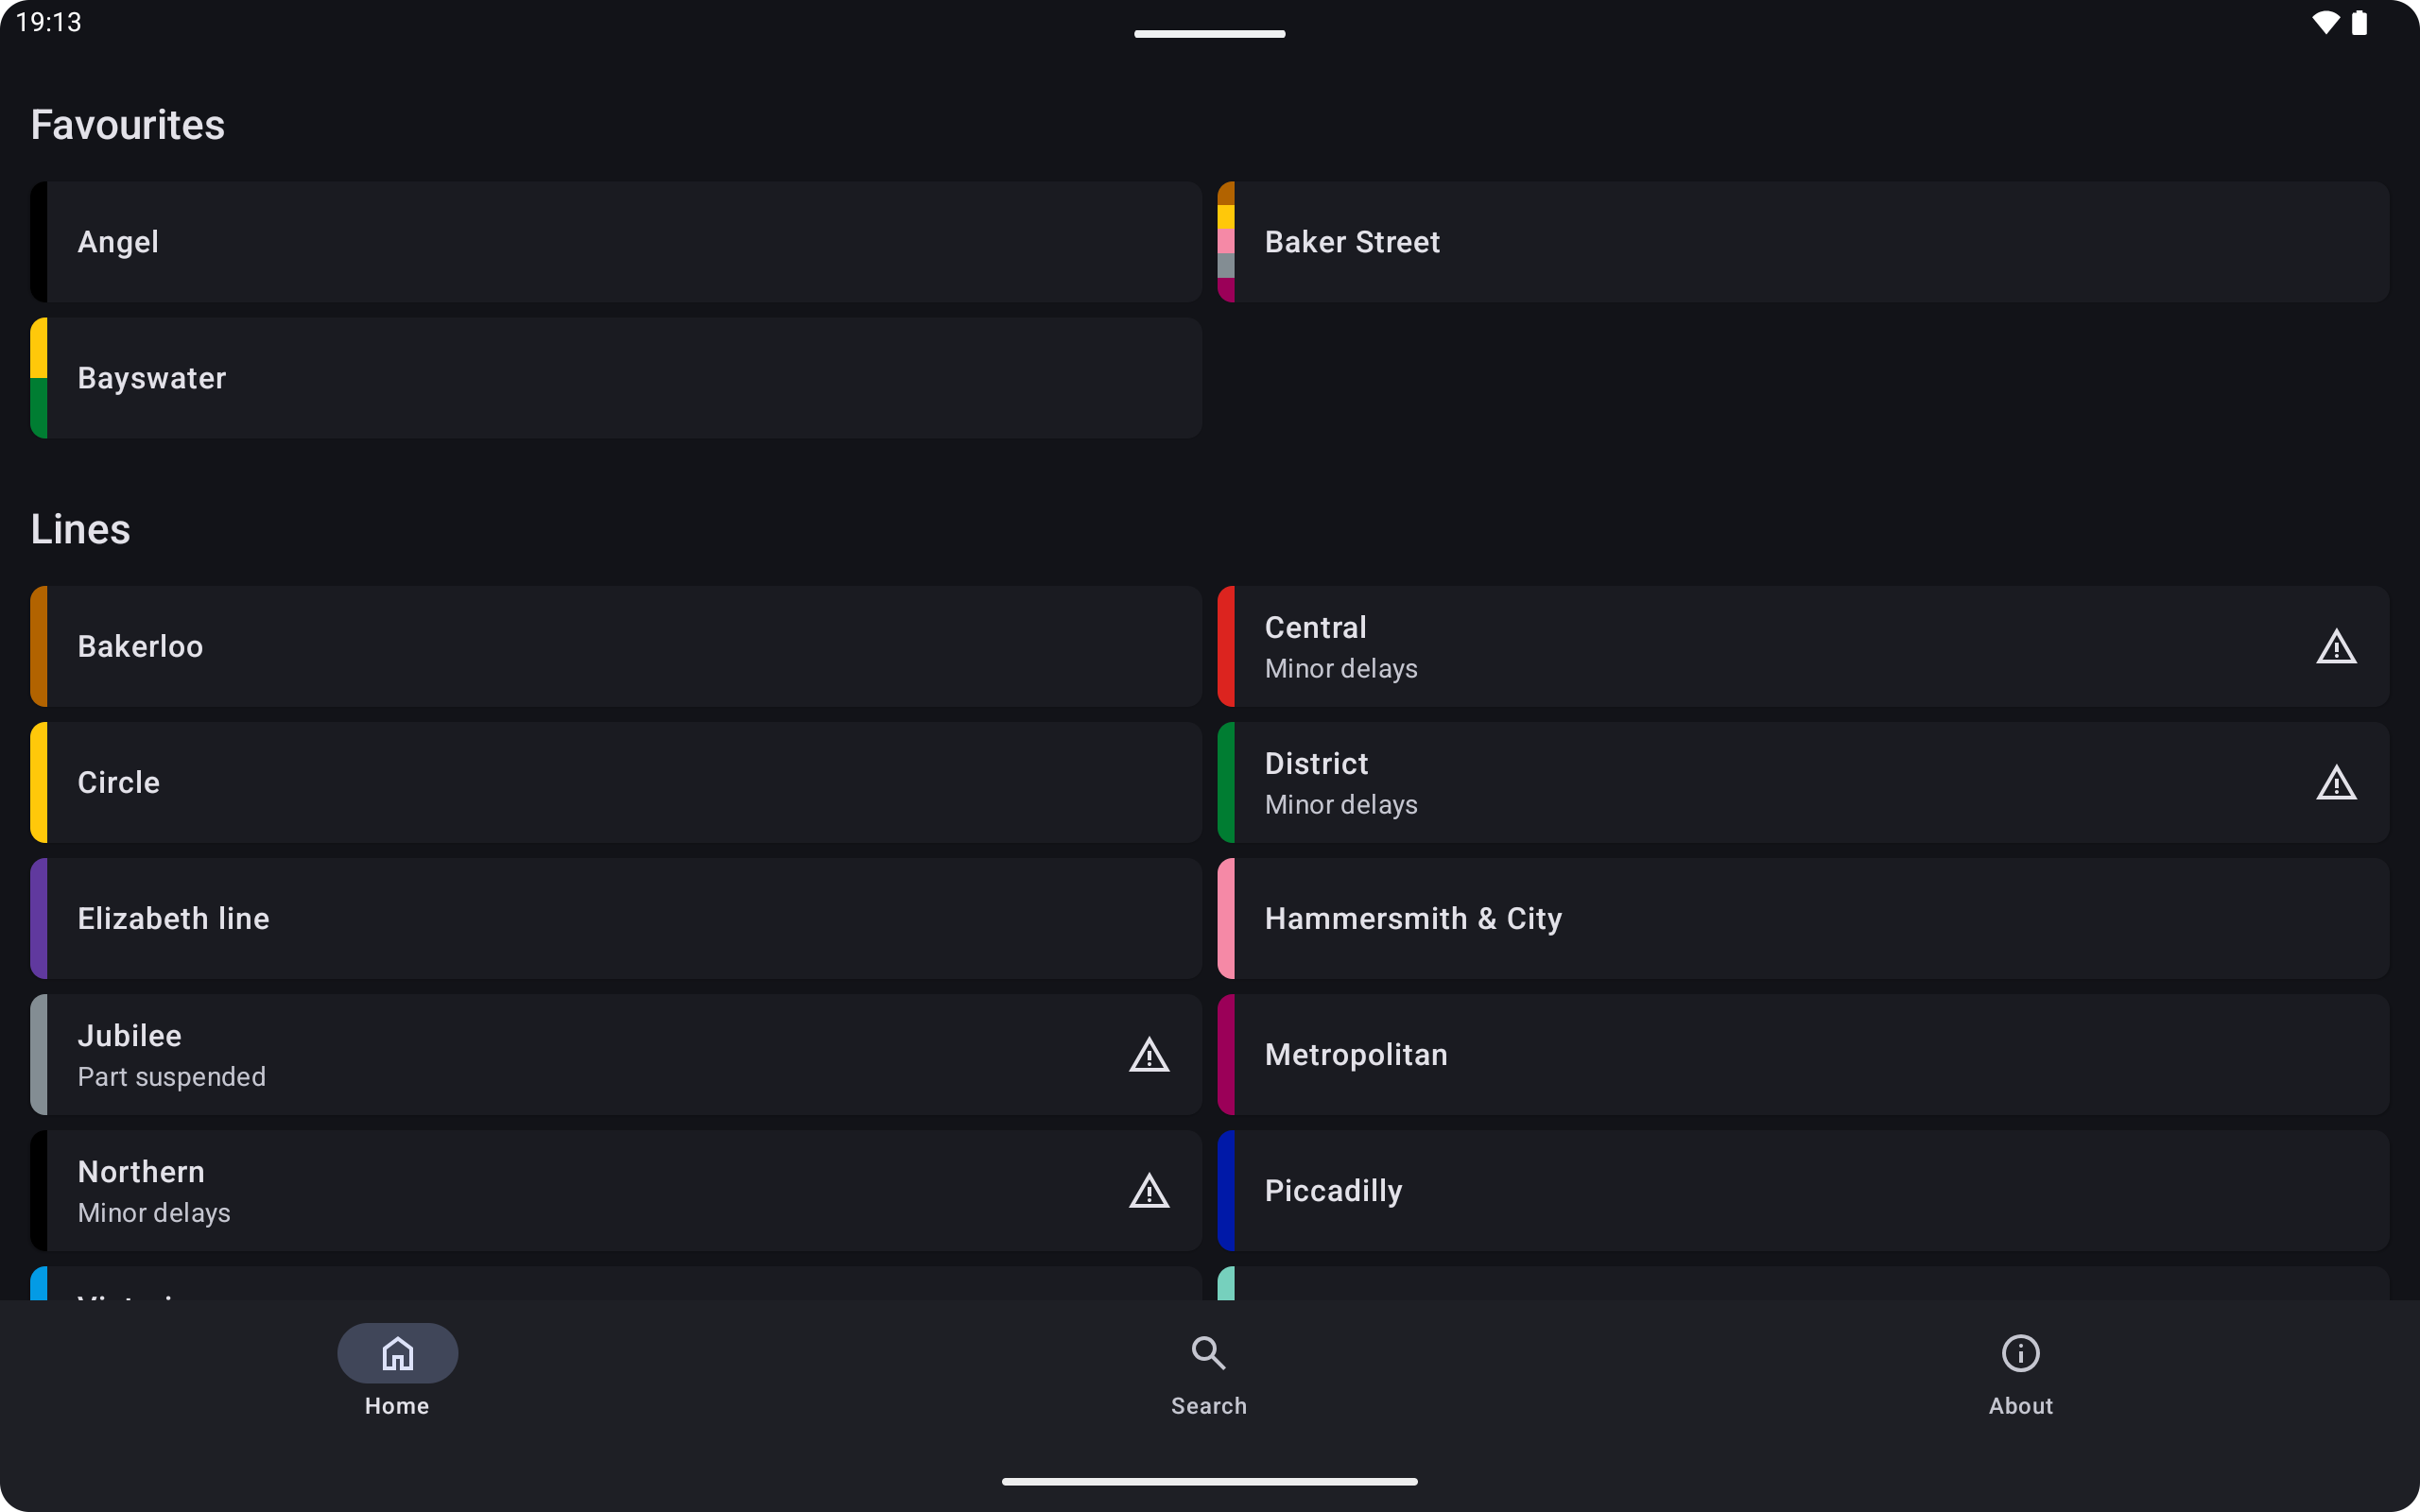
What I ended up doing is creating a
custom layout using Layout
that behaved as I desired. It’s good that that’s possible, but it was more
effort than it should be. Here’s a screenshot of the same favourites list using
my grid component that uses a custom layout:
Another gripe relates to icons. Lots of official code samples, including the
documentation for getting started with Jetpack Compose, use the
androidx.compose.material.icons library.
But if you do a bit more reading, you’ll discover that that library is
no longer recommended and the icons it contains have been replaced by Material Symbols.
If you want current versions of the icons, you instead have to individually
download them from Google Fonts.
Third-party libraries
Outside Jetpack (aka AndroidX) and official Kotlin libraries, I didn’t find that I needed much else.
I used OkHttp for making HTTP requests.
There are also lots of libraries in the dependency tree whose licences require attribution of some kind, so I had a look at Google’s solution for displaying an open-source licences screen. I found that it had UI bugs, was based on old tech, and the latest version2 of the required Gradle plugin didn’t work.
I switched to AboutLibraries, which is much more pleasant and just works.
The IDE and my wireless debugging problem
When I first had a go at creating an Android app over 11 years ago, Eclipse was the recommended IDE. I did not like Eclipse. I don’t remember using it for long before switching to Android Studio.
Generally speaking, I like JetBrains IDEs. One particular problem I have with
Android Studio is that 95% of the time, it won’t pair or automatically connect
to my phone using wireless debugging (pairing just returns an error after a
while). Everything works though if I use adb on the command-line (and once
connected via the command-line, the IDE sees the phone and can interact with it
normally).
It’s been a problem for me for a long time, so there’s probably something particular about my set-up causing it.
APIs
With the new app, I wanted to address some limitations that the old app had. The current Transport for London (TfL) APIs also need authentication for any serious use. So, I built an API server to go along with new the app. I picked Python and FastAPI since I’ve used both before and they suited the task well.
This also means I can do all the required data munging server-side, and make data-related fixes without having to release a new version of the app. I’m also able to cache TfL API responses for a short period, helping to keep inside request limits should the app get popular.
Sourcing data from TfL
I won’t spend too long talking about the TfL APIs, as there’s already plenty of info on them out there.
The main API that TfL provide is the Unified API. This provides data on multiple modes of transport, and multiple categories of data. There are some out-of-date links around, but this is the current API spec.
For the Tube specifically, there is also an older, lower-level XML API based on a system called TrackerNet. Some (slightly out-of-date) documentation for it is available in PDF form. The Tube arrivals data in the Unified API is also sourced from the TrackerNet system (though clearly with some processing done to the data).
The data returned by the TrackerNet API is a pain to work with for various reasons. Still, I prefer to use it and do my own data processing, as I believe I can get a better result in the end. I’m not sure most others would bother, but I’m glad that the TrackerNet API is still available.
There are various static data sets available too, documented on the TfL open data page.
TfL also have a forum where their APIs and open data can be discussed.
Naming the app
My original app had Tube in the name, because TfL used to say you could use the word Tube (albeit, somewhat contradictorily, given it also said not to use their trademarks3).
The current guidelines, however, essentially say not to use Tube in the app name. So I’ve kept Tube out of the app name. (There are several other apps on Google Play that do have Tube in the name, as well as TfL and other things. I have no idea what’s going on there.)
Publishing the app
I already had a developer account on Google Play from the original app I published, so I didn’t need to go through the faff of setting up a new account.
The original app was now unpublished. I thought it made sense to publish the rewritten app as an update to the old one, and so I went about trying to do that.
I struggled to find my way round the current interface of Google Play Console. I really wasn’t expecting to find the place where you edit the app name, description and screenshots under an expandable section called ‘Grow users’. And, even though I’ve now used it several times, I still struggle to find the button to create a new app release.
There are also things in the documentation that seemed incorrect. For example, the documentation for uploading screenshots recommends entering alt text:
Include alt text with each screenshot. Alt text is important for screen-reader users who cannot see your uploaded screenshots. For that reason, using alt text descriptions will greatly enhance your app’s visibility among users of assistive technology.
There is nowhere to enter alt text when uploading screenshots2. I thought I was missing something, but I checked the web listings for other apps, including some of Google’s. The alt text for each screenshot is always ‘Screenshot image’.
After saving changes to the app, it goes through some automated checks that take around 15 minutes. Following that, my submissions so far have only taken a few minutes to be reviewed (which is a pleasant surprise).
Sadly though, my republished app is buried in the rankings for relevant things people would search for. Perhaps that’s not helped by the app’s name (though it’s hard to be sure). In any case, no one is currently likely to find the app via search, and it indeed doesn’t seem to have attracted any users yet. I suspect that things won’t improve unless I actively promote the app. It’s only been a week and a half since I republished the app though.
Should I add ads?
The app is not free to run. I thought about putting adverts in it. That’s currently difficult, as Google did not approve my AdMob account (which is a whole other story). In any case, there is little point adding ads to the app when it’s getting little use.
Still, I may add ads at some point. Or I may not, and just keep the app as something to keep my Google Play developer account in good standing.
What did the old app look like?
If you’re feeling nostalgic, I still have some screenshots of a 2015 version of the original app. Here are a few:
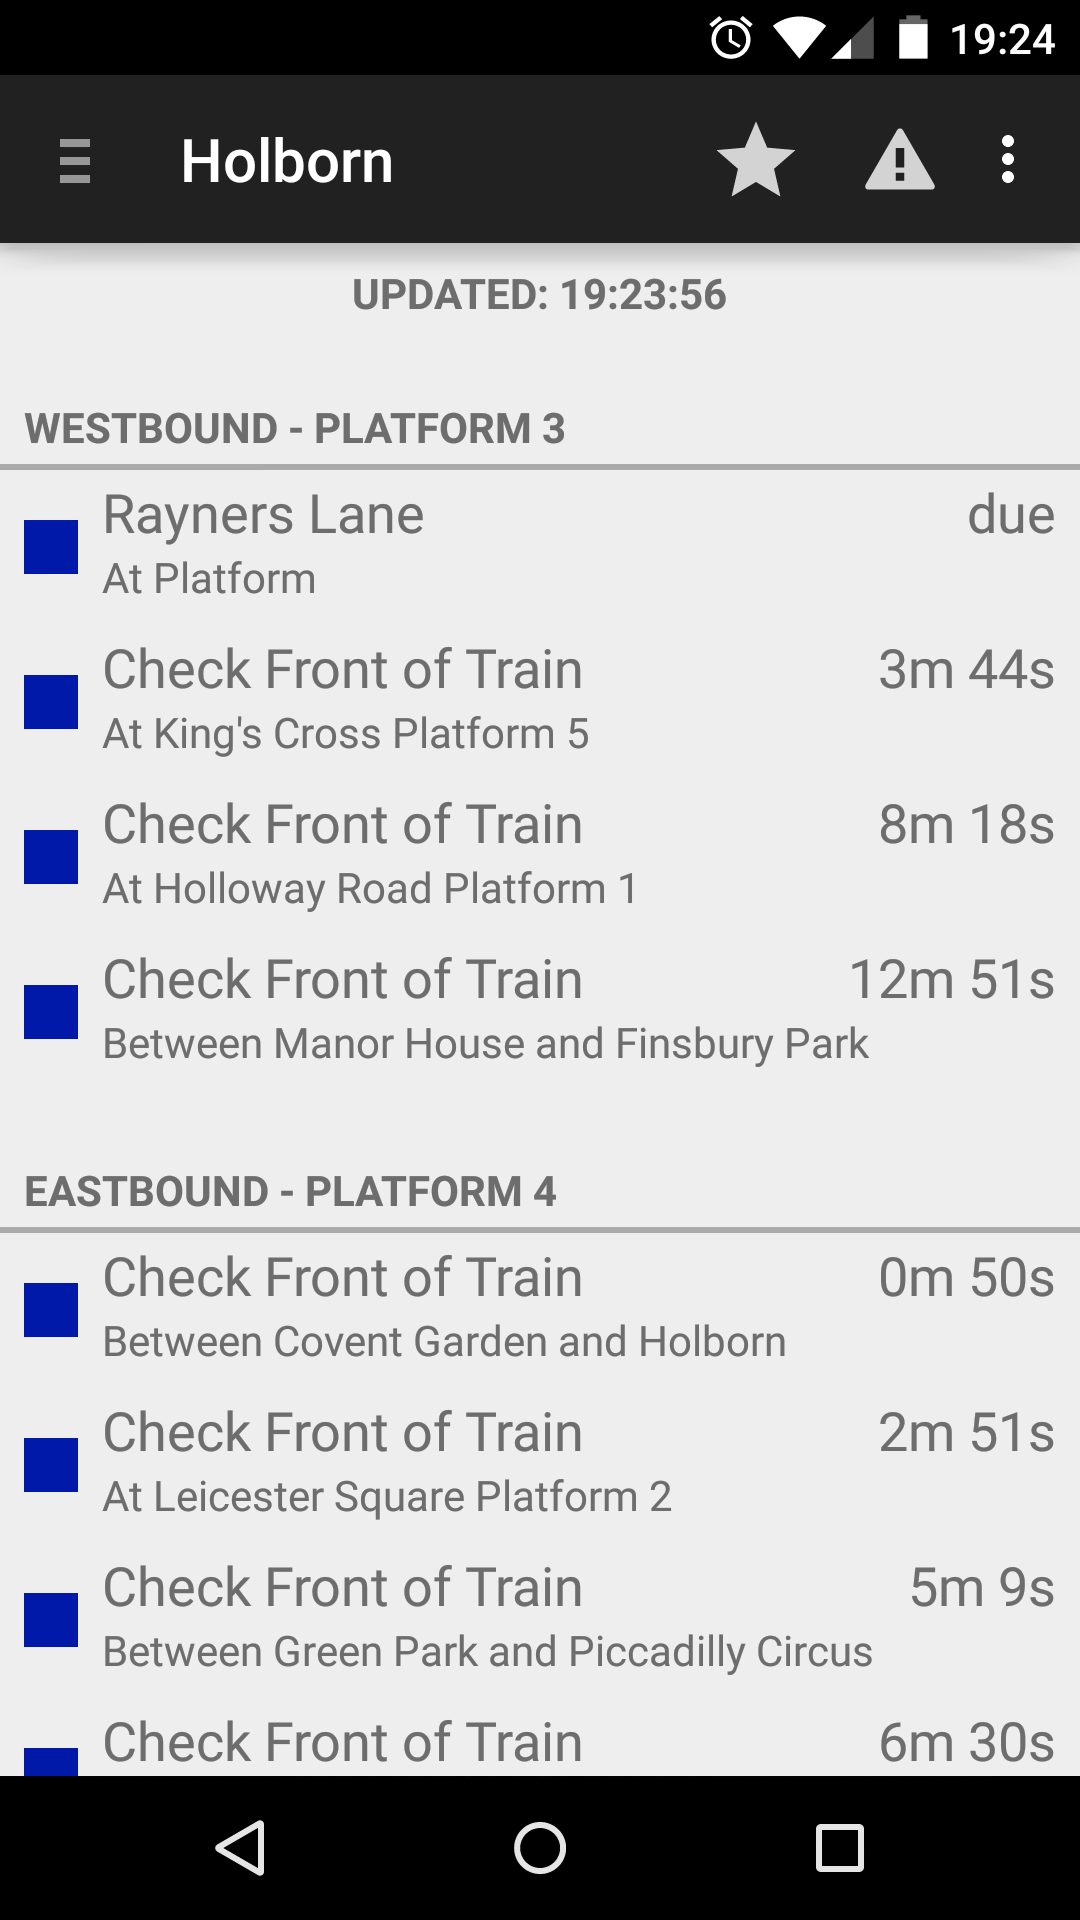
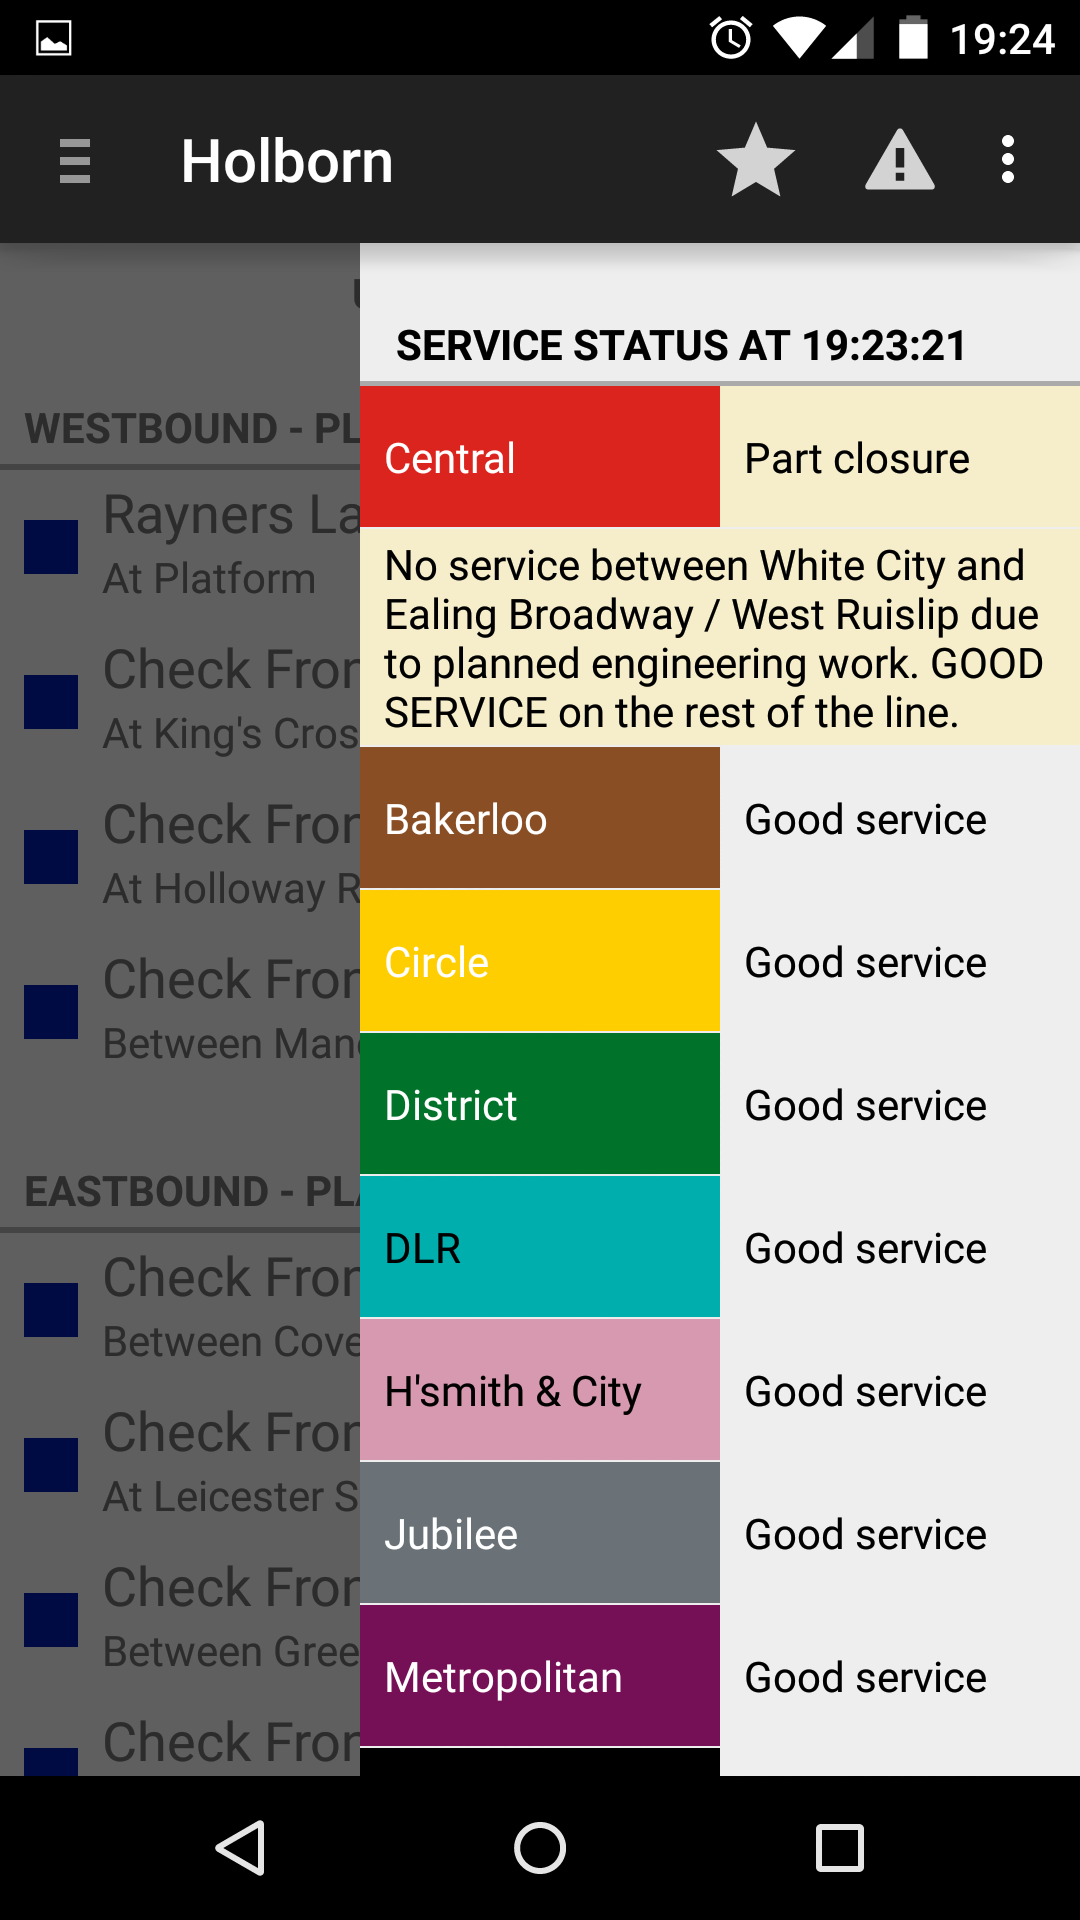
(You might notice that it showed the current (or, more accurately, last known) location of each train. You can still see that in the new app, by tapping on a train to expand it.)
Footnotes
-
Departure times are practically more useful than arrival times, though you mostly don’t get departure times from the data. I suppose something like ‘train proximity’ might be the most accurate description of what is being shown. ↩
-
I came across a trademark registration for THE TUBE, another for THE TUBE, and one more for TUBE. ↩