
I recently bought a Canon RF 800mm F11 IS STM lens for my Canon EOS R camera.
While the lens is light for an 800mm lens, it’s still too large and heavy to take out and about on a whim (for me, at least). But there are still interesting things to take photos of from my back garden. In this case, that’s Jupiter and Saturn.
Jupiter
Finding Jupiter with the naked eye is usually pretty easy as it’s exceptionally bright. Manually pointing an 800mm lens at Jupiter is trickier: the small angle of view and fixed focal length mean you have to be very precise.
Vibrations are also magnified, so I controlled the camera using Canon’s mobile app for the most part to avoid inducing shake by touching the camera. (A nice feature of the app is that you can make very precise manual focus adjustments. That, along with the 10x live view zoom, make focusing much easier.)
I took a series of photos using continuous shooting, stopping when the camera pauses to take a breather (usually after about 50 shots). Here’s a crop of an above average photo from that series (with sharpening turned off, and the image resized to three times the original size):
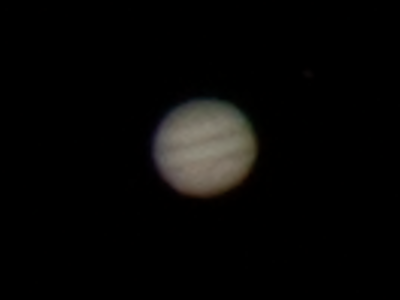
That was taken at a shutter speed of 1/250 seconds and at ISO 400. It’s a bit noisy, but you can make out some of Jupiter’s bands.
To get a better result, I stacked most of the 50 photos using AutoStakkert!:
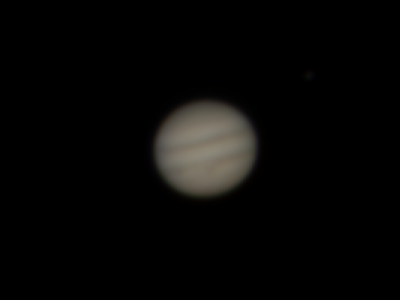
The result is a soft but less noisy image. I enabled the Drizzle algorithm in AutoStakkert! to produce an image three times the original size.
To combat the softness, the last thing I did was apply some wavelet sharpening using Siril:
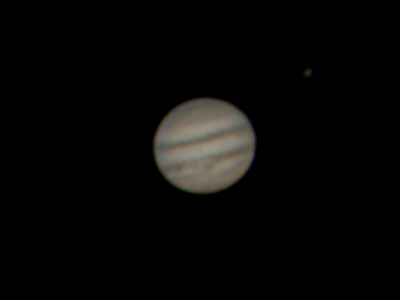
Like magic, the blurriness is mostly gone.
As a comparison to what Jupiter actually looked like, here’s a screenshot from Stellarium Web at the same time and location:
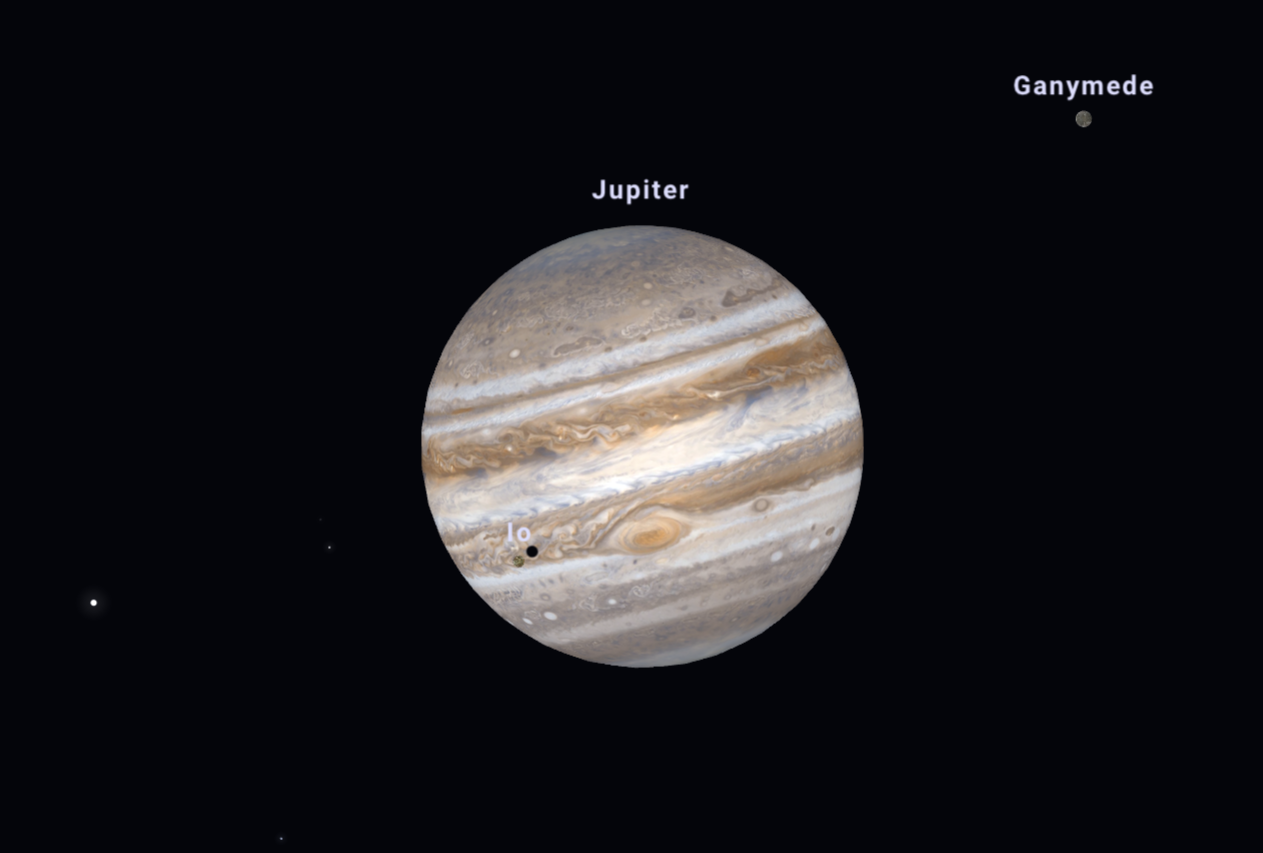
Ganymede, one of Jupiter’s moons, is in the sharpened photo at the top-right. The sharpened photo also has a small smudge in a similar location to Io and its shadow. (Two other moons, Europa and Callisto, are also visible outside of the crop above.)
Saturn
I’d never tried to take a photo of Saturn before, but it was the next most obvious thing in the night sky to try and photograph with my kit. I went through the same process as I did for Jupiter. Saturn is not as bright as Jupiter, so I used a much higher ISO setting of 1250. (It was also not as high in the sky as Jupiter, making atmospherical seeing more of a problem.)
Here’s an above average shot from the series of photos I took:
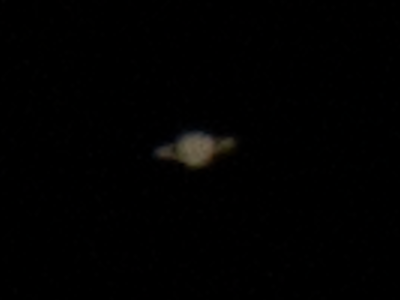
It’s only really a shape – but that’s good enough to make out the rings (not individually, of course!)
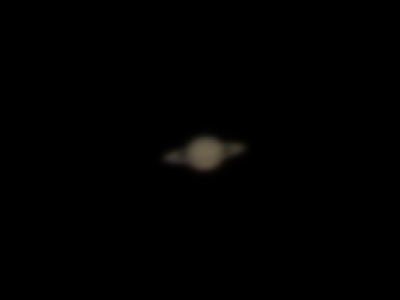
Here’s the result of stacking the series of photos:
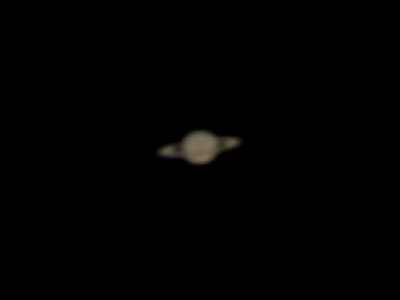
Sharpening Saturn was not quite the same as sharpening Jupiter – there isn’t much detail to sharpen, so instead we’re trying to sharpen the shape. Here’s what I ended up with:
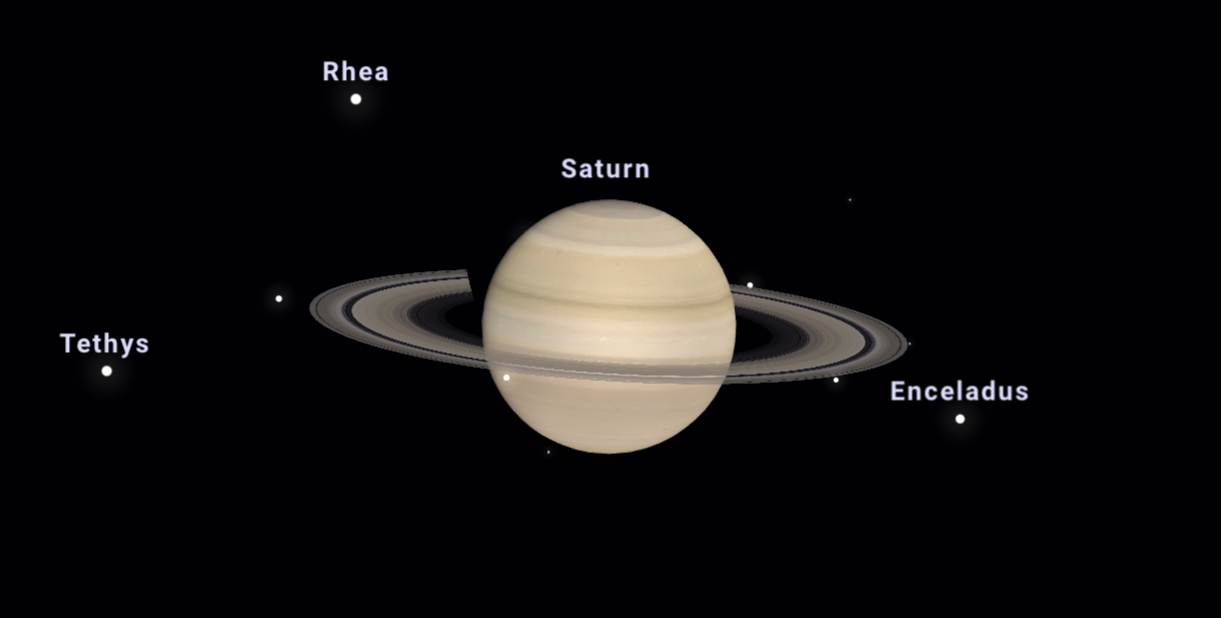
A screenshot from Stellarium as a comparison:
Wrapping up
This was just a bit of fun, but the results were better than I imagined. Better photos can be taken with an appropriate telescope and specialised astronomical camera, but I don’t have those and am not in a rush to buy them.
Some ideas for improving the results with my kit are:
- using an equatorial mount that rotates with the earth, allowing slightly longer exposures and hence lower ISO settings
- using either the Canon RF 1.4x or 2x extender to magnify the image
- upgrading my camera to a higher-resolution one like the Canon EOS R5
- experimenting further with stacking
- trying some specialised software to capture images from the camera with a computer connected by USB
If I ever get noticeably better photos, I’m sure I’ll be back here posting again...